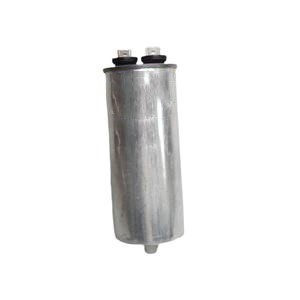
Thyristors Online | High-Quality Power Semiconductors

** Bend It Like a Pro: Mastering Thyristor Legs for Flawless Soldering **.
(Preparing Thyristors for Soldering: Bending Legs Correctly)
Thyristors are small powerhouses in electronic devices, but their legs can be persistent. Bend them wrong, and you take the chance of fractures, bad links, and even a fried element. Obtaining those steel legs to behave isn’t brain surgery– it has to do with patience, accuracy, and a couple of professional techniques. Let’s simplify.
Initially, comprehend why flexing matters. Thyristor legs aren’t simply cords. They’re expansions of the inner structure. Rough handling can stress the seals where metal fulfills the component body. Tiny fractures right here let dampness or dust sneak in, resulting in very early failing. Plus, messy bends make soldering harder. Crooked legs will not rest flush on a motherboard, producing weak joints or shorts.
Start by collecting tools. You’ll require needle-nose pliers, a level surface, and maybe a magnifying glass. Stay clear of utilizing your fingers. Fingernails aren’t precise, and oily deposit can damage solder bonds later on. Tidy tools matter as well. Wipe pliers with isopropyl alcohol to get rid of dust or oil.
Next off, examine the datasheet. Not all thyristors have the same leg format. Some have anode, cathode, and gateway leads in particular orders. Bend the incorrect leg, and your circuit won’t function. Mark the legs with colored tape if needed. A tiny error right here can throw away hours repairing later.
Currently, the bending strategy. Hold the thyristor body stable with one hand. Use needle-nose pliers to grasp the leg * a minimum of 2 mm * from the part base. This maintains stress away from the sensitive seal. Bend gradually, in one smooth movement. Do not shake or turn– steel exhaustions quick. Aim for a 90-degree angle, yet if the style requires a contour, make it mild. Sharp folds are powerlessness.
View the placement. All legs need to rest level on the board without force. If one leg holds up, re-bend it. Test-fit the thyristor on a scrap board or paper design template. If it totters, change. Perfect positioning now means fewer migraines during soldering.
Stay clear of common errors. Never ever bend legs after soldering. The heat softens the steel, making fractures more probable. Do not reuse thyristors drawn from old boards– their legs are currently work-hardened and breakable. If a leg snaps, garbage the element. Repair attempts rarely hold under lots.
Temperature level matters as well. Cold settings make steel fragile. If your office is cold, warm the thyristor slightly with a hairdryer first. Simply do not overheat it– think warm, not hot.
Practice makes excellent. Grab a few inexpensive thyristors and experiment. Notice how different stress affect the legs. Way too much force causes twists; inadequate leaves legs loose. Locate the sweet place where the metal bends efficiently without resistance.
Still anxious? Make use of a flexing jig. Some pros 3D-print custom-made guides to hold parts at the best angle. Move the thyristor in, push the legs against the layout, and boom– perfect bends whenever. No jig? Tape the component to a ruler edge as a makeshift guide.
Finally, examine your work. Shine an intense light on the legs. Look for micro-cracks or irregular surface areas. Run a finger delicately along the bend– it must really feel smooth, not jagged. If something really feels off, remodel the bend. Better to lose a min now than a whole job later.
(Preparing Thyristors for Soldering: Bending Legs Correctly)
Soldering prepped thyristors is like repainting a work of art– the preparation job determines the outcome. Crisp bends imply tidy joints, strong connections, and a circuit that hums with integrity. Grab those pliers, channel your inner surgeon, and turn those spindly legs into works of practical art.