Thyristors Online | High-Quality Power Semiconductors

Okay, here is the rewritten blog post following your specifications.
(How To Test Thyristor)
Catchy Title: Is Your Thyristor Working? The Detective’s Guide to Testing This Crucial Switch
Blog Content:
Electronics can be tricky. Parts fail. Circuits misbehave. When things go wrong, figuring out which component is the culprit is key. One common suspect? The thyristor. This little switch handles big jobs in power control. But how do you know if yours is good or bad? Don’t worry, testing it isn’t rocket science. Think of yourself as an electronics detective. Grab your tools; let’s solve the mystery.
1. What Exactly is a Thyristor? (The Suspect Profile)
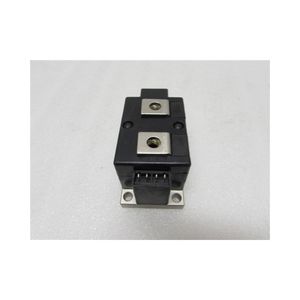
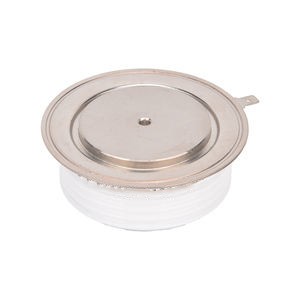
First things first. What are we dealing with? A thyristor is a solid-state semiconductor device. Think of it like a special kind of switch for electricity. But it’s not a simple on/off button you press. Its real name is a Silicon Controlled Rectifier, or SCR for short. That’s a mouthful, so we usually just say thyristor.
Imagine it has three legs, or terminals: Anode, Cathode, and Gate. The Anode and Cathode are the main path for the big current. The Gate is the control point. Give the Gate a little nudge of electricity, and the thyristor switches on. Now, current flows freely from Anode to Cathode. Here’s the catch: once it’s on, it stays on. Turning it off isn’t about the Gate. You have to stop the main current flowing through it. Only then does it turn off. It’s a latching switch. This makes it perfect for controlling power in AC circuits or DC motor drives where you need that holding action. Understanding this basic behavior is step one in knowing how to test it.
2. Why Test a Thyristor? (The Case for Investigation)
So why bother testing it? Thyristors are tough, but they aren’t invincible. Like any part, they can fail. A failed thyristor can cause all sorts of headaches in your circuit or machine. Maybe the motor won’t start. Perhaps the light dimmer flickers wildly. The power supply might shut down unexpectedly. These are the symptoms that point to our suspect.
Testing helps you pinpoint the problem. Is the thyristor dead? Is it stuck on? Or maybe it won’t turn on at all? Finding this out saves time and money. You avoid replacing other good parts unnecessarily. You get your equipment running again faster. Testing is simple. It often just needs a basic multimeter. Knowing how to test a thyristor is a valuable skill for anyone working with electronics or electrical repairs. It’s basic troubleshooting.
3. How to Test a Thyristor with a Multimeter (The Interrogation)
Alright, down to business. How do we test it? The most common tool is a digital multimeter. You don’t need fancy equipment. Here’s a step-by-step method:
Step 1: Safety First. Make sure the thyristor is completely disconnected from any circuit. No power. Also, let it sit for a minute if it was recently powered. This ensures any stored charge is gone. Safety is important.
Step 2: Identify the Pins. Find the Anode (A), Cathode (K), and Gate (G). Check the datasheet if you’re unsure. Knowing the pins is crucial.
Step 3: Check for Shorts (Anode to Cathode). Set your multimeter to the diode test function. It usually shows a little diode symbol. Touch the red probe to the Anode. Touch the black probe to the Cathode. A good thyristor should show no reading, like “OL” (Over Limit). This means it’s blocking current, which is correct when off. Now, reverse the probes: black to Anode, red to Cathode. Again, it should show “OL” or a very high value. If you get a low reading either way, it might be shorted. That’s bad.
Step 4: Check for Opens (Anode to Cathode via Gate). Keep the black probe on the Cathode. Touch the red probe briefly to the Gate. You should see a small voltage reading, like 0.5 to 0.8 volts. This simulates turning it on. Now, without removing the black probe, move the red probe from the Gate to the Anode. If the thyristor is good, the meter should now show a voltage reading, similar to a normal diode forward drop (around 0.5 to 0.8 volts again). This means it latched on when you triggered the Gate. If it doesn’t show this reading, the thyristor might be open or not triggering. That’s also bad.
Step 5: Confirm Latching (Optional but Helpful). After Step 4, remove the red probe from the Anode. Put it back on the Gate briefly. Then put it back on the Anode. The reading should remain. It should stay latched. Now, remove both probes completely. Wait a few seconds. Put the red probe back on the Anode and black on the Cathode. It should now show “OL” again. The thyristor turned off when the current stopped. This confirms the latching action works correctly.
This basic test covers most common failures: shorts, opens, and failure to trigger. If it passes all these steps, it’s likely good.
4. Where Do We Find Thyristors? (The Scene of the Crime)
Thyristors aren’t hiding. They are workhorses in many places. Knowing where they are used helps you know when to suspect them. Here are some common applications:
Light Dimmers: That knob controlling your living room lamp brightness? Often uses a thyristor to chop up the AC power cycle.
Motor Speed Controls: Controlling the speed of large electric motors, especially DC motors, frequently relies on thyristors.
Power Supplies: Some types of regulated power supplies use thyristors for switching and control.
Battery Chargers: Certain charger circuits employ thyristors to manage the charging current.
Heating Controls: Industrial heaters or even some soldering irons might use thyristors for precise temperature control.
Surge Protectors: Some designs use thyristors to quickly shunt excess voltage away.
Basically, anywhere you need to control high power, especially AC power, a thyristor might be the component doing the switching. If something in these areas stops working right, testing the thyristor is a smart move.
5. Thyristor Testing FAQs (Closing the File)
Let’s answer some quick questions people often have:
Can I test a thyristor in-circuit? Usually not recommended. Other components in the circuit can give false readings. Removing it is best for an accurate test. Desolder it carefully.
My multimeter doesn’t have diode test. What can I do? You can use the resistance setting (Ohms). The steps are similar. Look for very high resistance (like “OL”) between Anode and Cathode initially. Then, touching Gate to Cathode (with correct polarity) should cause the resistance between Anode and Cathode to drop significantly, showing it turned on. It’s less precise than diode test but can work.
The thyristor triggers but won’t stay latched during the test. Why? This often happens because the multimeter doesn’t provide enough holding current. The test current is very small. Some thyristors need a minimum current to stay on. It might actually be okay in the real circuit. Don’t panic. Consider it “probably good” if it triggered at all.
I think my thyristor is overheating. Is that a sign? Absolutely. Excessive heat often means it’s failing or working too hard. Check for shorts or improper triggering. Also, make sure its heatsink is properly attached and working.
(How To Test Thyristor)
Are there different types of thyristors? Do I test them all the same? Yes, there are variations like TRIACs (which control AC in both directions) and DIACs (often used to trigger TRIACs). The basic test for a standard SCR thyristor is as above. TRIAC testing is a bit more complex because it has two main terminals that can act like Anode or Cathode depending on direction. The principle is similar, though – checking for blocking and triggering. Always check the datasheet for specifics.