Thyristors Online | High-Quality Power Semiconductors

Checking Your TIC106M Thyristor: A Straightforward DIY Overview for Electronic Devices Tinkerers
(How To Test A Thyristor Tic106m)
Obtained a suspicious TIC106M thyristor lying around? Perhaps it’s salvaged from an old circuit or fresh out the plan. These little power switches control big currents crazes like lamp dimmers or motor controllers. But when they act up, your job delays. Testing one isn’t frightening. Order your multimeter and allow’s play detective.
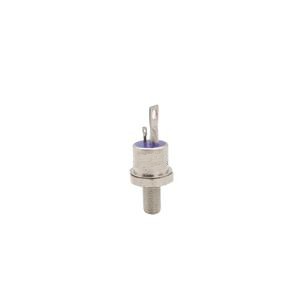
Initially, understand your opponent. A thyristor has 3 pins: anode, cathode, and gateway. Think about it like a gatekeeper. Generally, it obstructs current between anode and cathode. Zap the gate with a little voltage, however, and it activates, letting power flow till the current drops. The TIC106M manages approximately 400 volts, so treat it with respect.
You need a standard electronic multimeter. Set it to diode examination setting. That’s the setting with a little diode sign. It sends out a small test existing best for examining semiconductors. Security initially: unplug every little thing and discharge any kind of capacitors nearby. One zap can fry your meter or the thyristor.
Locate the pins. Many TIC106M thyristors have the anode left wing, cathode in the middle, and gate on the right when you’re staring at the level side. Double-check your datasheet if unsure. Incorrect pin assumptions mean incorrect results.
Currently, test for shorts. Touch your multimeter’s red probe to the anode. Touch the black probe to the cathode. The meter should show “OL” or a really high number. That suggests no present circulations. Great. If it reveals a low number, the thyristor is shorted and dead.
Next off, inspect eviction trigger. This is the enjoyable component. Keep the red probe on the anode. Relocate the black probe to the gate. Press it there for a second. You should see a reduced analysis, like 0.7 volts. That’s the gate allowing the test current through.
Below’s the magic. While keeping the black probe on the gate, slide it over to the cathode. Do not lift it. Just drag it across. The meter ought to still reveal a reduced voltage. That suggests the thyristor “latched” on. It remained performing also after you left the gate.
Raise both probes. The thyristor shuts off. Now repeat the first anode-to-cathode examination. It should reveal “OL” once more. If it does, your thyristor is healthy and balanced. If it stayed on after getting rid of eviction signal, it’s faulty.
What happens if it really did not lock? Perhaps your meter’s examination current is also reduced. Try a fresh battery in the multimeter. Still nothing? Order a 9V battery and a 100-ohm resistor. Link the battery’s positive to the anode. Connect the resistor in between the gate and the battery’s negative. Quickly touch the cathode to the unfavorable. It needs to activate.
Remember, thyristors fail two means. They either brief (constantly on) or open (never ever on). Both spoil your circuit. Examining takes mins but conserves hours of debugging.
(How To Test A Thyristor Tic106m)
So following time your electric motor controller misbehaves or that classic radio remains quiet, don’t criticize the entire board. Fish out that TIC106M. Probe it. Master it. Keep spare thyristors helpful. They’re low-cost, and now you understand how to detect the excellent ones.