


Thyristors Online | High-Quality Power Semiconductors

** Title: Thyristor TLC: Maintaining Your SKKT 15/08 Powerhouse Purring **.
(How To Check A Skkt 15/08 Thyristor)
So your device all of a sudden stops. Maybe an electric motor declines to begin, or a control panel tosses a fit. Before you panic or contact pricey help, take a breath. Typically, the wrongdoer is a tiny but magnificent element: the thyristor. Specifically, the SKKT 15/08 version is a real workhorse in power control. Think of it as a super-precise switch for electrical energy, managing significant existing. Like any type of tough worker, it can wear out. Knowing just how to check it on your own saves time, money, and disappointment. It’s much easier than you assume, needing simply standard devices and a careful eye.
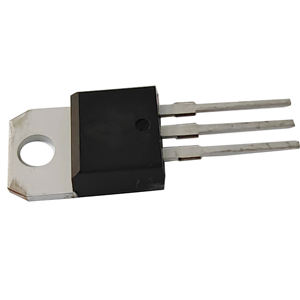
Initially, safety policies. Always, always separate power. Make definitely sure the equipment is off and unplugged. Provide it time to cool down as well. These points can fume. Next off, locate the thyristor. Seek a tiny, flat component with three metal legs (terminals). It must be marked clearly as SKKT 15/08 or something very comparable. Its task is generally controlling huge power streams, so it’s often close to warmth sinks or power areas on the motherboard. Once you find it, keep in mind exactly how it’s placed. Take a fast phone photo prior to you touch anything. This assists place it back properly later.
Currently, get your reliable multimeter. Establish it to diode check setting. This mode is best for evaluating semiconductor junctions inside the thyristor. Initially, examination eviction and Cathode legs. Touch the multimeter’s red probe to the Gate terminal. Touch the black probe to the Cathode terminal. Your meter should show a voltage decrease, usually between 0.5 V and 1.5 V. This is great. It indicates eviction junction is undamaged. Currently, turn around the probes. Black probe on Entrance, red probe on Cathode. The meter ought to review “OL” (Overload) or show a really high resistance. This is also good. It validates the gate just functions one way, like a diode should. If you obtain analyses both methods, or no analysis in any way regardless, the thyristor’s entrance is most likely fried. It needs replacing.
The following test is in between the Anode and Cathode. Switch your multimeter to resistance setting, usually the highest variety (like 20k ohms or 200k ohms). Touch the red probe to the Anode terminal. Touch the black probe to the Cathode terminal. Your meter must show an extremely high resistance, usually “OL”. This is what you desire. It implies no current is sneaking via when the thyristor should be off. Now, reverse the probes. Black probe on Anode, red probe on Cathode. Once again, you need to see a really high resistance reading, “OL”. This verifies the major power course is properly blocking present in its off state. If you gauge low resistance regardless in between Anode and Cathode, the thyristor is most likely shorted inside. It’s dead.
Don’t fail to remember the physical look. Check the thyristor thoroughly. Seek obvious signs of difficulty. Check for splits in the plastic instance. Search for staining– dark brown or black spots are bad information. See if the steel legs are burned or melted anywhere. Provide it a mindful sniff. That distinctive scent of scorched electronics? That’s a certain sign something allowed the magic smoke out. Any physical damage typically suggests it’s time for a substitute, no matter the meter analyses.

(How To Check A Skkt 15/08 Thyristor)
Doing these easy checks gives you power. You can confidently recognize if the SKKT 15/08 thyristor is the weak link. It takes mins. It saves hours of uncertainty. Maintain your multimeter helpful, comply with these steps thoroughly, and you’ll keep those power electronic devices running efficiently. Go dominate that stubborn equipment!